As explained in Chapter 1, Windows Server Core includes a minimal
version of the server software without the GUI; you perform all
configuration tasks from the command prompt. Follow this procedure to
install Windows Server Core and perform initial configuration tasks:
- Insert the Windows Server 2012 R2 DVD-ROM and turn on your computer. You should see a message informing you that Windows is copying temporary files; if not, you should access the BIOS setup program included with your computer and modify the boot sequence so that the computer boots from the DVD.
- After a few minutes, you receive the Windows Server 2012 R2 screen shown in Figure 2-1. Click Install now to begin the installation.

- Figure 2-1 Starting the installation of Windows Server 2012 R2.
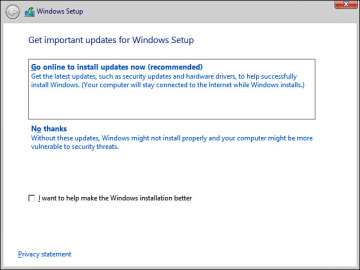
- Windows copies temporary files and then displays the Get important updates for Windows Setup screen shown in Figure 2-2. If you’re connected to the Internet, select Go online to install updates now (recommended).
- On the next Install Windows screen, click Install now.
- You receive the options shown in Figure 2-3, which enable you to install the complete Standard or Datacenter version of Windows Server 2012 R2 with a GUI or Windows Server 2012 R2 Server Core. Select the Windows Server 2012 R2 Datacenter (Server Core Installation) option and then click Next.
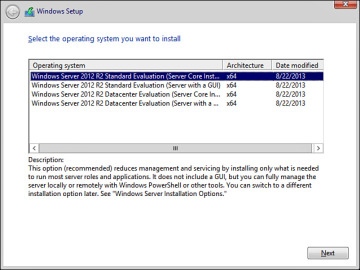 Figure 2-3 This screen enables you to select either the complete installation of Windows Server 2012 R2 or the Server Core option.
- You are asked to accept the license terms. Select the check box labeled I accept the license terms and then click Next.
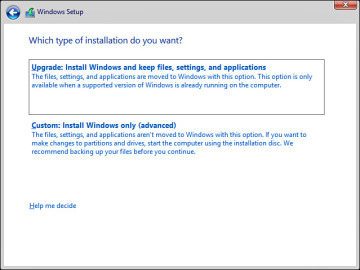
- You receive the options shown in Figure 2-4 to upgrade or install a clean copy of Windows Server 2012 R2. Select Custom (advanced) to install a clean copy of Windows Server 2012 R2. The upgrade option is available only if you have started the installation from within Windows Server 2008, Windows Server 2008 R2, or the original version of Windows Server 2012.
- Select the disk on which you want to install Windows and then click Next.
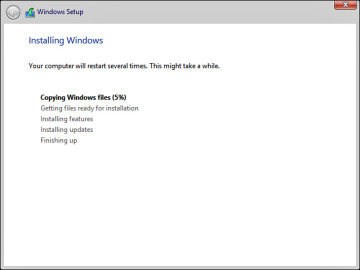
- Take a coffee break while the installation proceeds. This takes some time (particularly when installing on a virtual machine), and the computer restarts several times. As shown in Figure 2-5, Setup charts the progress of installation.
- After 15–30 minutes (depending on your hardware), Windows restarts a last time and informs you that your password must be changed before logging on for the first time. Click OK.
- Type and confirm a strong password. When informed that the password is changed, click OK. After a minute or so, the desktop appears, containing a command window but no Start screen or desktop icons (see Figure 2-6). This is the standard Windows Server Core interface.
- To set the correct time, type control timedate.cpl. By default, Server Core sets the time zone to Pacific Time. If you are in a different time zone, you will need to change this. Set the appropriate time zone, change the date and time if necessary, and then click OK.
- Windows installs Server Core with a randomly generated computer name. To set a name of your choice, type netdom renamecomputer %computername% /newname:ServerC1 (where, in this instance, ServerC1 is the name you’re assigning; substitute your desired server name).
- Windows warns you that the rename process might have an adverse impact on some services. Type Y to proceed.
- You are informed that the computer needs to be restarted in order to complete the rename. Type shutdown /r /t 0 to reboot your server.
- After the server reboots, press Ctrl+Alt+Delete and log on using the password you set in step 11.
No comments:
Post a Comment